As someone who hasn’t been able to aim with sticks since around 2008, the ability to calibrate, customize, and eventually implement gyro controls in Steam Deck makes me consider the internal gyroscope one of the hidden gems of the Deck. Not every game supports motion controls, but in those that do, it can be a more convenient alternative to a stick and touchpad; after all, you’re getting the precision of using both hands in tandem, rather than one crooked thumb.
That said, the whole system isn’t worth a damn if the gyro isn’t calibrated properly. Below, you can see a step-by-step guide on how to calibrate Steam Deck’s gyro controls – as well as how to adjust them (or, if you’re not convinced, disable them entirely) for each game. There’s no need to switch to desktop mode, and in fact, these settings can be freely tweaked once you’re in the game.
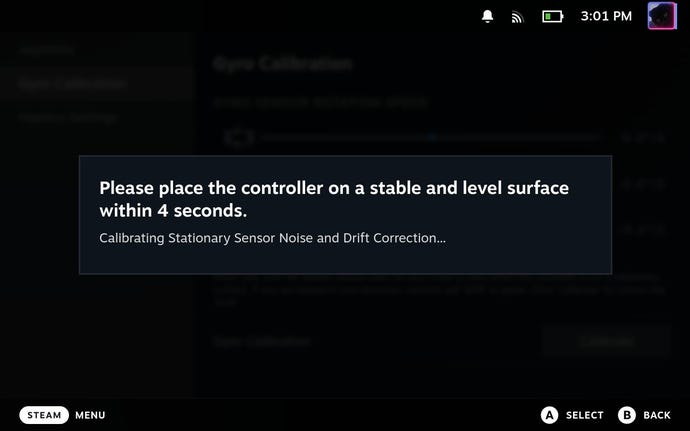
It’s worth mentioning, though, that calibration requires the Deck to be placed on a flat, stable, completely level surface, and within just four seconds of activating the process. In other words, don’t try this on a bus. Make sure you’ve got a desk, table, or comfortable runway before you start, lest you end up scrambling for a seat while that (admittedly, rather stingy) timer ticks down.
How to Calibrate Gyro Controls in Steam Deck
Step 1: Press the Steam button and open the Settings menu.

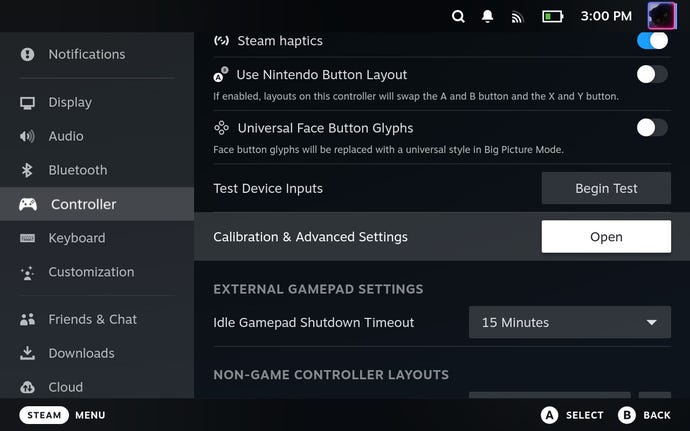
Step 2: Scroll down to the Controller section. Here, look for “Calibration and advanced settings”—you’ll have to scroll down in this submenu to find it—and press “Open.”
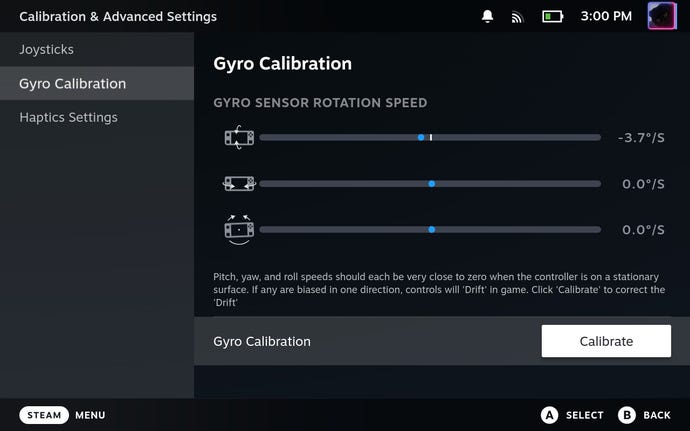
Step 3: Select “Gyroscope Calibration.” You’ll see three bars with little dots that shake back and forth as you move Steam Deck. Just below them is a “Calibrate” button, so tidy off any flat surface and press it.
…button, not surface.
Step 4: Immediately put the Steam Deck down and leave it there for a few seconds; as the screen reminds you, you only have four seconds to do this. Fortunately, the calibration process itself doesn’t take much longer, so when you see the message “Calibration Succeeded,” press the B button to close. And that’s it: one calibrated Steam Deck gyro, ready to shoot handheld.
How to Customize or Disable Gyro Controls in Steam Deck
Step 1: Gyro controls can be customized for each game individually, so start by selecting the game you want to make changes to from your Library.

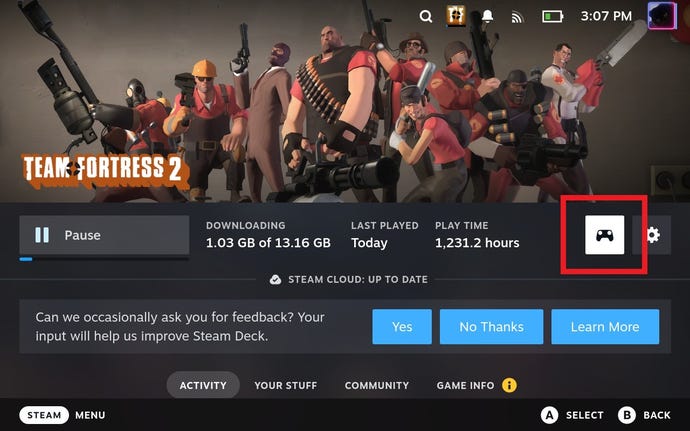
Step 2: Select the Controller Settings icon, which is the diminutive image of a controller on the right side, next to the gear icon.
Step 3: Scroll down to the “Gyro Behavior” section. To completely disable gyro control, simply select “None” from the drop-down list.
Or if you want to change what the gyro input is used for, select a differential behavior from this list. In the example shown, Team Fortress 2 allows you to employ the gyro input for aiming (via the “Look” option) or for player movement, with the gyro essentially replacing the left analog stick in the latter case.
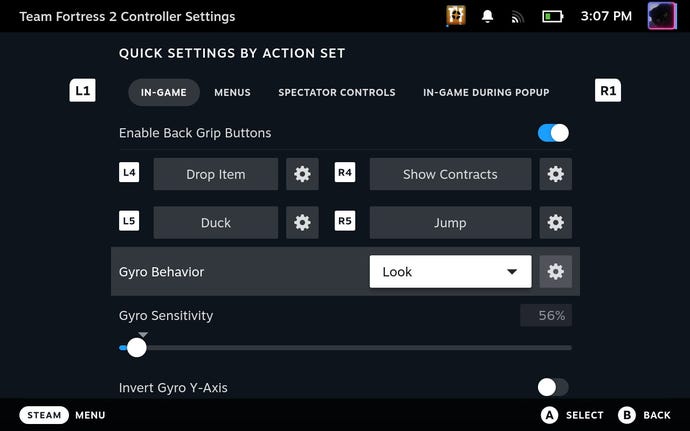
Step 4: There are a number of other customisation options available by pressing the gear icon next to your currently selected gyro behaviour. These include choosing to invert the X or Y axis, raising or lowering the motion threshold (useful if you don’t want every small twitch to be recorded as input), and gyro activation buttons. These are necessary if you only want gyro control to be enabled when holding down a specific button or, in the case of the thumbstick and trackpad, simply resting your thumb on them. I won’t make any specific recommendations here – just experiment and tweak these settings to find the configuration that works best for you.
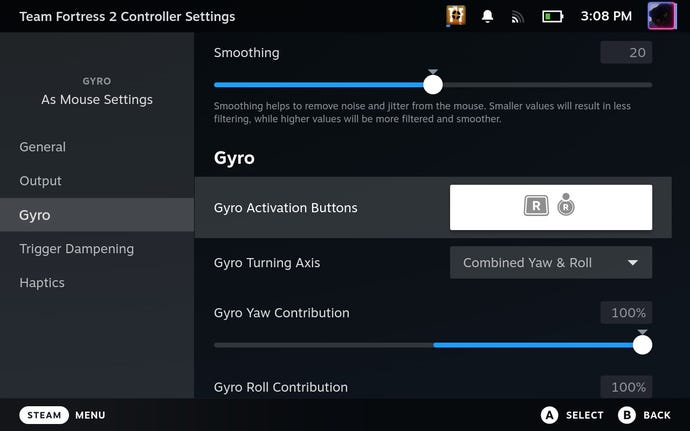
Also note that all of these settings can also be changed on the fly. While in game, press the Steam button and find the Controller Settings shortcut on the right, under the game menu. This is the exact same Controller Settings menu you’ll see if you access it through the Library, so you can make all of the same changes or disable gyro input entirely.

